
I'm going to re-post this tutorial now that Halloween is over and we can focus on Thanksgiving. You'll have to use your imagination and pretend that the "Boo" says "give thanks". I originally took pics for the "Boo" and "Boo Y'all" pillows, but the directions are the same except for the phrase.

Step One: Print out your word or phrase that you want on your pillow. Enlarge the word/phrase on a copy machine. (My home copy machine does not enlarge so I my print -outs it to the local Office Max self-serve copy machine).
 Step Four: Using regular acrylic paint and a sponge brush, carefully paint the inside of the stencil. Don't forget to put a piece of paper between the two layers to prevent the paint from bleeding through.
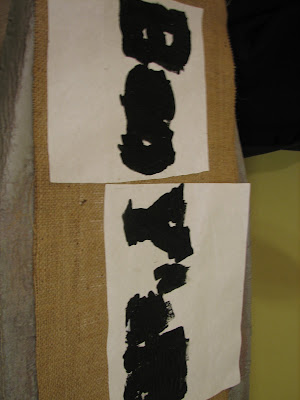

Step Five: Carefully remove the freezer paper. It is not necessary to wait until the paint dries.
Step Six: Enjoy!!

To see how to make the actual pillow with the self-fringe, click HERE.
I'm linking to Today's Creative Blog and A Soft Place to Land,
 You'll have to use your imagination and pretend that the "Boo" says "give thanks". I originally took pics for the "Boo" and "Boo Y'all" pillows, but the directions are the same except for the phrase.
Step One: Print out your word or phrase that you want on your pillow. Enlarge the word/phrase on a copy machine. (My home copy machine does not enlarge so I my print -outs it to the local Office Max self-serve copy machine).
Step Two: You can either trace your word/phrase onto freezer paper, or cut your freezer paper to 8 1/2 x 11 and run it through your home copy machine. (see more info about this in an earlier post by clicking HERE).
Step Three: Using your handy dandy Exacto knife, cut out your word/phrase from the freezer paper. With the waxy side facing the burlap, iron the freezer paper into place. I usually iron my big piece first, then add the "island pieces".
Step Three: Using your handy dandy Exacto knife, cut out your word/phrase from the freezer paper. With the waxy side facing the burlap, iron the freezer paper into place. I usually iron my big piece first, then add the "island pieces".
 Step Four: Using regular acrylic paint and a sponge brush, carefully paint the inside of the stencil. Don't forget to put a piece of paper between the two layers to prevent the paint from bleeding through.

Step Five: Carefully remove the freezer paper. It is not necessary to wait until the paint dries.
Step Six: Enjoy!!

To see how to make the actual pillow with the self-fringe, click HERE.
I'm linking to Today's Creative Blog and A Soft Place to Land,


